Facebook Custom Events
This is an advanced configuration option
Be sure to read our documentation on Rockerbox's requirements for Facebook Pixels & Events first
Using Facebook Custom Events & Conversions
If you are unable to use the standard ViewContent and Purchase events, you can also create your own events and define them as conversions. This guide will walk you through what you need to configure on your website and in Facebook in order to set this up.
Step 1: Create the Custom Event
In your tag manager or website code, add a line like the following to create a custom event using the Facebook pixel:
fbq("track", "my_custom_event");
Be sure to replace "my_custom_event" with the your own, unique name for your event.
After you have implemented this on your website, you should see your new event showing up in Facebook's Events Manager
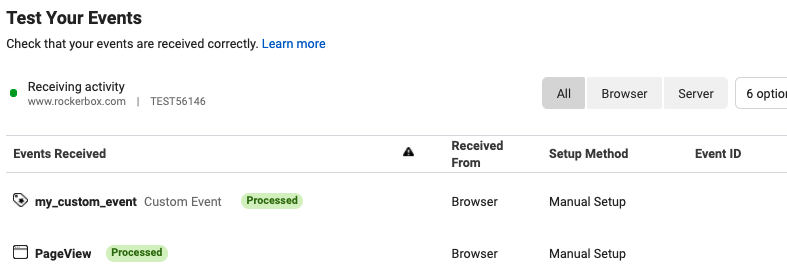
Step 2: Create the Custom Conversion
In the top right corner of your Events Manager page, click Create* and select Create Custom Conversion** .
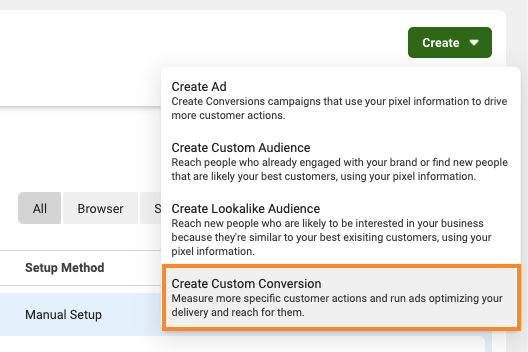
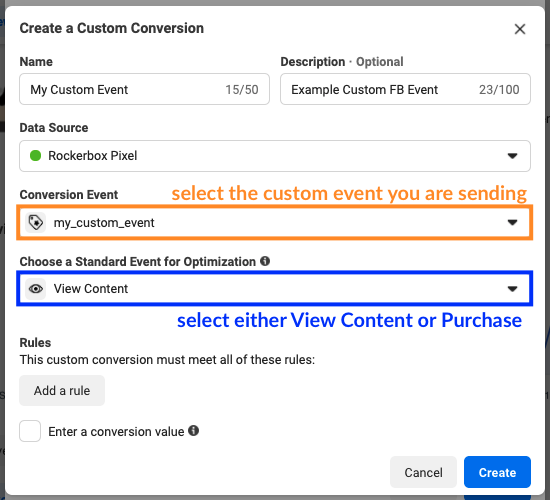
In the following form, enter your information to create a custom conversion using the custom event you fired in the previous step.
Be sure to select View Content or Purchase in the last dropdown, depending on the type of event you are tracking. Your selection won't affect any targeting or optimization of your ads.
Click Create to submit the form. Afterwards, you should see a success message. Click Go to settings to continue with the final Facebook set up step.
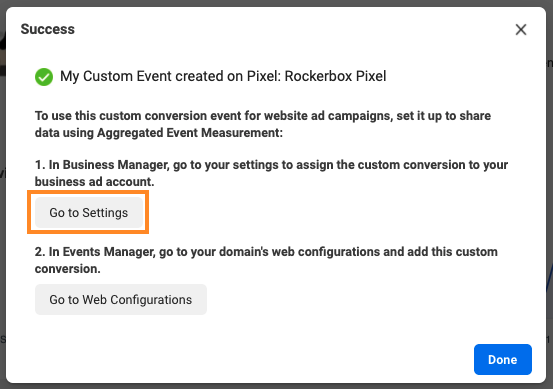
Step 3: Link the Custom Conversion to your Business Account
If you followed the previous step, you should be taken automatically to the Facebook Custom Conversions settings page. If not, you can navigate there from Facebook Business Manager > Business Settings > Data Sources > Customer Conversions.
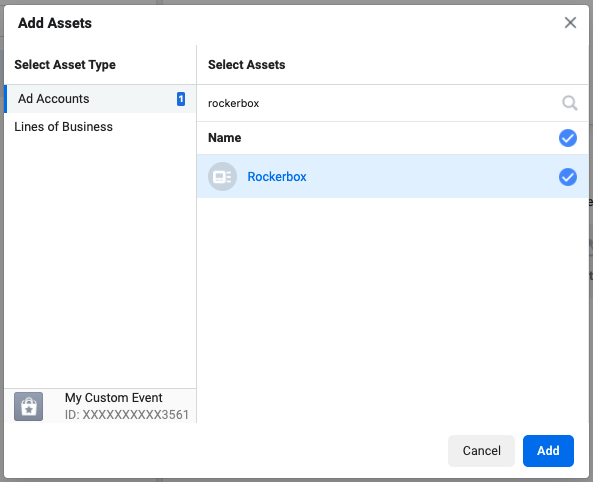
Find the Custom Conversion you created and click Add Assets.

In the Add Assets pop-up, search for your ad account, select it, and click Add.
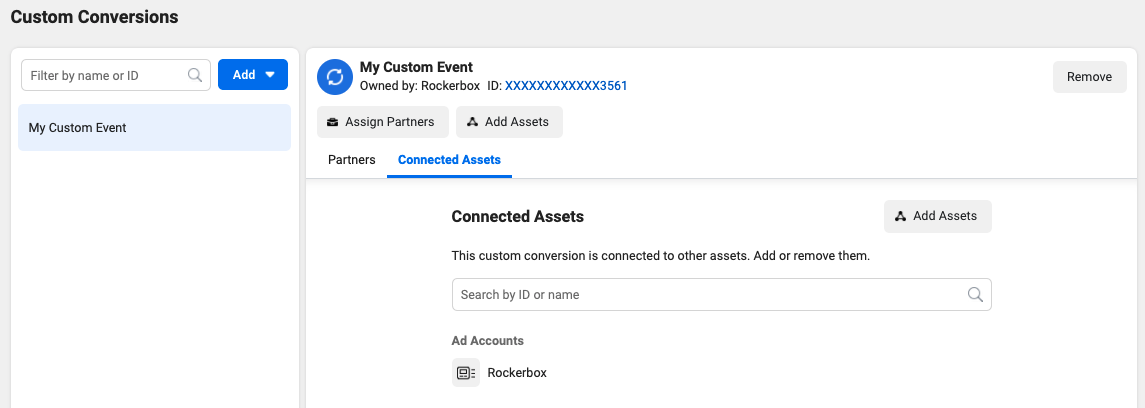
You should now see your ad account listed under Connected Assets.
Step 4: Update your Facebook Synthetic settings in Rockerbox
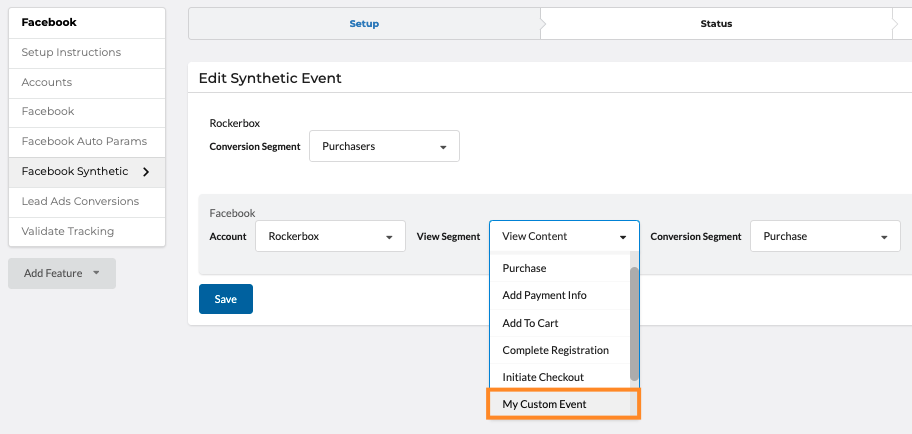
Finally, go to Settings > Integrations > Facebook > Facebook Synthetic in your Rockerbox account to select the new Custom Conversion you created as the corresponding View or Conversion segment.
Updated almost 3 years ago
